

| Key Points | Details to Remember |
|---|---|
| 📌 Definition of ConnexaFlow | Cloud workflow automation platform |
| 🚀 Main Benefits | Time saving, error reduction, and process consistency |
| ⚙️ Configuration Steps | Account creation, connectors, scenarios, testing |
| 🔗 Possible Integrations | External applications: CRM, ERP, messaging, storage |
| 🤖 Automation Scenarios | Reminders, data transfers, personalized alerts |
| 📊 Monitoring and Optimization | Log analysis, continuous adjustments |
ConnexaFlow presents itself as a discreet partner to streamline data exchange between your business tools. Rather than manually juggling from one interface to another, you create smart scenarios that run unattended. In this article, we explore each step from registration to deployment, with some context to understand what’s happening under the hood and how to maximize the impact on your organization.
Somaire
Why Choose ConnexaFlow?
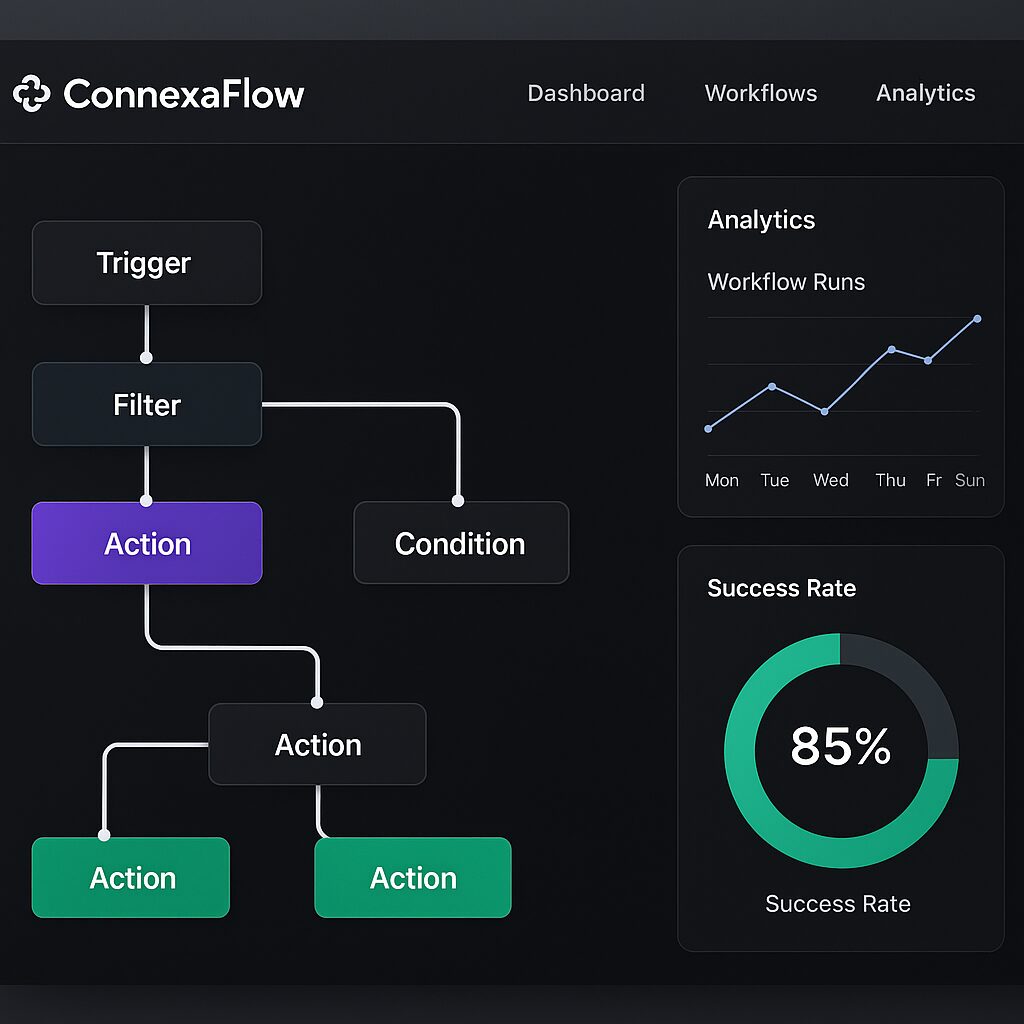
One might think all automation platforms look alike, but ConnexaFlow has a few cards up its sleeve to stand out. First, its graphical interface focuses on clarity: flows are organized into “nodes” connected by arrows, a familiar diagram even for a novice. Next, the connector library covers most popular applications. Finally, pay-as-you-go billing avoids locking the budget into an overly expensive plan upfront.
In practice, this tool becomes a game-changer as soon as you need to regularly transfer contacts from a CRM to a storage space, or automatically generate reports at the end of each month. Instead of copy-pasting, you deploy a single scenario and let ConnexaFlow take care of everything.
Steps to Configure ConnexaFlow
1. Create and Secure Your Account
The first formality is to create an account on the platform. At registration, choose a strong password, ideally generated by a password manager, and enable two-factor authentication. ConnexaFlow offers a role system: administrator, contributor, and viewer. Assign them based on criticality, so each collaborator only has access to the flows that concern them.
A word on governance: in a medium-sized team, it is recommended to have only two or three administrators. The more there are, the more the configuration risks becoming scattered.
2. Install and configure connectors
As soon as your workspace is ready, you can connect your applications. ConnexaFlow offers a catalog of more than 50 integrations, from the most common (Salesforce, Google Sheets, Slack, Microsoft Teams) to custom APIs. The process is often the same: you choose the application, enter your OAuth credentials or API key, then test the connection. A small blue checkmark indicates that everything is operational.
- Check the requested permissions before validating.
- Give each connector a clear name to simplify management.
- Add tags if you have many environments (dev, test, prod).
Sometimes certain APIs impose quotas: be vigilant not to trigger unexpected errors during a peak in activity.
3. Design your automation scenarios
This is where the magic happens: you assemble your actions into a logical sequence. For example, as soon as a new lead is created in your CRM, you can:
- Send a welcome email.
- Add a row in Google Sheets for tracking.
- Notify your team on Slack.
Each step fits like a module inside the visual canvas. You adjust the settings, possibly with conditions (if amount > 1,000 €, then add a manager). This granularity transforms a simple automation into a custom assistant.
4. Test, adjust and deploy
Before any production deployment, ConnexaFlow’s test mode is a valuable ally. You execute your scenario step by step, and you visualize the data passing from step A to step B. If a field is incorrectly mapped, you correct it, then rerun. Count about thirty minutes for a complex scenario, and a few minutes for a fairly simple flow.
Once satisfied, activate the scenario and choose the frequency (immediate, every 5 minutes, hourly…). You can then monitor the success rate and any errors directly from the dashboard.
Best practices and tips
To ensure sustainable automation, here are some tips based on experience feedback:
- Document each scenario: add a concise description to understand its purpose six months later.
- Set up alerts in case of failure: a webhook can trigger an SMS or email to notify you immediately.
- Regular log archiving: download or purge old executions to avoid saturating your quota.
- Quarterly review: identify underused flows, optimize or delete those that are no longer relevant.
These practices help avoid “workflow creep,” that accumulation of scenarios that no one really masters anymore.
FAQ about ConnexaFlow
What is the price of ConnexaFlow?
Pricing is based on the number of API calls and the volume of data processed. An entry-level plan starts around €20 per month for a few thousand executions. Beyond that, tiers are defined to always offer you more flexibility.
Can I host my own connectors?
Yes, ConnexaFlow supports custom connectors via a REST API. You deploy your micro-service, specify the call URL, and manage authentications directly from your infrastructure.
How to ensure data security?
Communications transit over TLS 1.2, and sensitive data can be encrypted at rest. The “data residency” option allows you to choose the storage region to remain compliant with local regulations.
